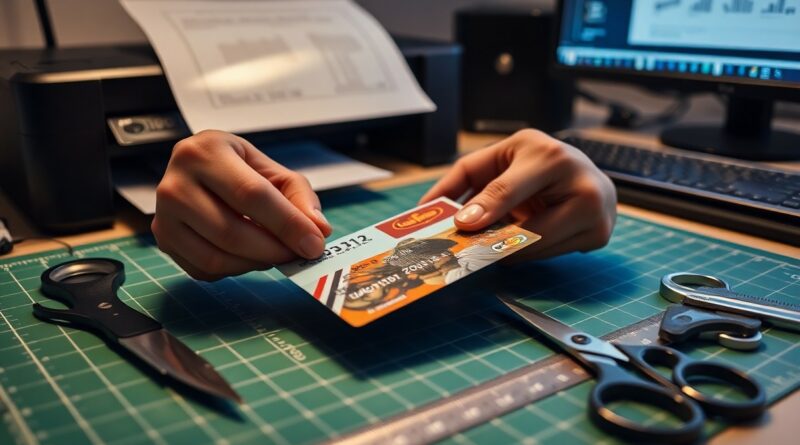
DIY Credit Card Skins – How to Design and Print Your Own at Home
Just imagine turning your plain credit card into a personalized masterpiece. With this guide, you’ll learn how to design and print custom card skins at home using simple tools and materials. You maintain full control over the look and security of your design, ensuring a unique finish that reflects your style. Avoid damaging your card by using only thin, durable adhesive film rated for high-wear surfaces. Follow each step carefully to create a professional-quality skin that fits perfectly and lasts.
Key Takeaways:
- Design your custom credit card skins using free tools like Canva by matching exact card dimensions (typically 3.375 x 2.125 inches) and ensuring high-resolution output to avoid blurriness when printed.
- Use printable vinyl and a reliable inkjet or laser printer for best results, then carefully cut the skins with a precision knife or scissors to fit snugly over your card without interfering with chip or magnetic strip functionality.
- Apply a clear laminate layer or adhesive-backed protective film to extend the life of your DIY skin, guarding against scratches, peeling, and daily wear while maintaining a professional finish.
Essential Material and Hardware Factors
You need a few key supplies to create long-lasting credit card skins. Use printable vinyl for the base layer, a home printer capable of precise output, and apply lamination to boost durability. Assume that material quality directly impacts performance, so choose each component carefully.
Selecting the best printable vinyl for adhesive longevity
Printable vinyl with a permanent adhesive backing ensures your skin stays in place over time. Look for brands like Oracle 651 or Avery MPI 1105 that resist peeling and yellowing. Assume that adhesive quality determines how well the skin holds up through daily use.
Identifying printer specifications for high-resolution graphics
Your home printer should support at least 1200 x 1200 dpi resolution to capture fine design details. Inkjet models like the Canon PIXMA PRO-200 or Epson SureColor P400 deliver accurate color and sharp edges. Assume that high-resolution output prevents blurring on small-scale prints.
Matching your printer to the vinyl matters for optimal results. Printers with pigment-based inks offer better fade resistance, while proper driver settings ensure correct alignment and color calibration. Using borderless printing mode helps maximize the usable surface area of the skin. Assume that precise hardware alignment prevents trimming errors and wasted materials.
How-to Design Custom Graphics with Canva
Free design tools like Canva provide the necessary platform for creating personalized card aesthetics, offering intuitive drag-and-drop editing and thousands of templates to streamline your workflow. You can access it from any browser without downloading software, making design accessible and efficient.
Setting up your digital canvas for custom projects
Your project starts with the right canvas size-set dimensions to 3.375 x 2.125 inches, the standard credit card size, for accurate scaling. Canva allows custom canvas creation, ensuring your design aligns perfectly with the physical skin. Matching real-world proportions prevents cropping errors during printing.
Incorporating personal branding and artistic elements
Colors, fonts, and logos define your identity-upload brand assets directly into Canva to maintain consistency. Use transparent PNGs for logos and limit your palette to three dominant colors for visual impact. Personal touches like monograms or signature artwork make your card uniquely yours.
When integrating personal branding, consider how professional designers use minimalism to enhance recognition-Apple’s clean lines or Nike’s simple swoosh are powerful because they’re uncluttered. Apply this principle by limiting text to one headline font and using high-contrast elements for readability. Canva’s grid alignment tools help position artistic features precisely, ensuring your final design looks polished and intentional.
Accurate Dimension and Layout Factors
To ensure your DIY credit card skin fits properly, strict design dimensions must be followed. Standard cards measure 85.60 × 53.98 mm with corner radii of 2.88-3.18 mm. Misalignment risks interference with card readers or poor adhesion.
- 85.60 × 53.98 mm – ISO/IEC 7810 ID-1 standard size
- 2.88-3.18 mm – Required corner radius range
- EMV chip – Positioned on the left side, front-facing
- Magnetic stripe – Located on the back, top third
Knowing precise measurements prevents functional issues during use.
Measuring for standard card sizes and corner radii
Your template must match the 85.60 × 53.98 mm dimensions defined by ISO/IEC 7810 ID-1. Most credit cards use this universal size, so deviating even slightly causes misalignment. Corner radii between 2.88 mm and 3.18 mm ensure smooth fitting into wallets and slots. Use vector-based design software with snap-to-grid enabled for accuracy. Knowing these specs guarantees a clean, professional fit.
Accounting for EMV chip and magnetic stripe placement
The EMV chip sits on the front left side of the card, typically 12 mm from the edge. Skin designs must leave this zone uncovered to prevent reader errors. The magnetic stripe runs across the top third of the back and should remain fully exposed. Overlapping either component disrupts functionality. Knowing where these elements are avoids costly mistakes during printing.
Blocking the EMV chip or magnetic stripe with adhesive material can permanently disable your card’s ability to process payments. The chip requires direct contact with terminals, and even a thin layer of vinyl can interrupt communication. Similarly, a misaligned skin covering the magnetic stripe may cause swiping failures. Always test your layout with a paper mockup before printing. Precision here protects both function and security.
How-to Configure Printing Settings for Vinyl
Proper printer settings are crucial when working with vinyl to ensure ink adhesion and color accuracy on vinyl media. Select the correct media type and adjust print quality to match non-porous surfaces. For best results, explore Results for “how to make a credit card skin” to see real-world examples and recommended workflows.
Adjusting media type and quality for non-porous surfaces
Set your printer to “vinyl” or “glossy film” mode to optimize performance on non-porous surfaces. This setting controls ink dispersion and drying time, preventing smudging. Using the wrong media type can result in poor ink adhesion and color accuracy on vinyl media, compromising your final skin’s durability and appearance.
Calibrating colors to match your digital design
Before printing, run a color calibration using your printer’s software to ensure what you see on screen matches the output. Differences in monitor settings can distort hues, leading to unexpected results. Accurate calibration maintains color accuracy on vinyl media and aligns with your original vision.
Color calibration involves printing a test swatch and adjusting your monitor and printer profiles based on visible discrepancies. Use ICC profiles specific to your vinyl material and printer model for the best match. Without this step, even high-quality designs may appear washed out or oversaturated, undermining color accuracy on vinyl media and reducing the professional finish of your custom skin.
Precision Cutting and Lamination Tips
Sharp tools and proper sealing make all the difference in durability and appearance.
- Use a cutter with fresh blades for clean lines
- Align edges carefully before trimming
- Apply laminating film smoothly to avoid bubbles
- Trim excess only after lamination sets
After following detailed guidance like in Skin Your Credit Card With SWEET Designs : 9 Steps, your skins will look polished and last longer.
Using precision tools for clean and accurate edges
A precision knife or trimmer ensures your design fits perfectly without jagged borders. Steady hands and a metal ruler guide straight cuts, reducing errors. Even slight misalignment can affect card usability, so take your time. After trimming with care, the skin slides smoothly into place.
Applying protective lamination to prevent scratches and fading
Lamination shields your design from daily wear and UV exposure. A clear, adhesive-backed film adds a scratch-resistant layer that preserves color and detail. Air bubbles can ruin the finish, so apply slowly with a squeegee. After sealing the edges fully, your skin withstands months of use.
High-quality laminating film not only blocks scratches but also prevents fading caused by sunlight and oils from your hands. Thermal lamination pouches offer stronger protection than cold-roll options, especially for cards carried daily. After sealing with heat, the film bonds tightly, creating a long-lasting barrier that keeps your custom skin looking fresh for months.
How-to Apply the Skin for a Professional Finish
Careful application empowers crafty readers to create truly one-of-a-kind card designs that look factory-made. Start with clean hands and a lint-free workspace to ensure your custom skin adheres smoothly and precisely, just like a professionally printed card.
Preparing the card surface for maximum adhesion
Use a microfiber cloth and a drop of isopropyl alcohol to wipe the entire surface of your credit card before applying the skin. Removing oils and debris ensures maximum adhesion, preventing peeling or shifting after placement.
Aligning and smoothing the skin to eliminate air bubbles
Peel the backing slowly and position the skin precisely from one edge, using a credit card-sized squeegee or your thumb to press out air as you go. Starting at one corner prevents misalignment and traps zero air bubbles for a factory-like finish.
Begin aligning the skin at the top edge of your card, letting it slowly adhere downward like a decal. If a bubble appears, lift the skin gently and re-smooth-most high-quality printable vinyls allow minor repositioning without tearing. This step mimics industrial lamination techniques, giving your DIY design a polished, professional-grade appearance that withstands daily use.
Final Words
So you’ve got everything needed to make your own credit card skins at home: use a high-resolution 3.375″ x 2.125″ design, print on adhesive vinyl with an inkjet or laser printer using mirror mode, and cut precisely with a trimmer or cutting machine. For step-by-step guidance, check out this post on How to make custom bank card stickers with Cricut? to ensure professional results every time.
FAQ
Q: What materials do I need to make DIY credit card skins at home?
A: You need printable vinyl sticker paper (matte or glossy), a home inkjet or laser printer, scissors or a precision craft knife, a ruler, clear laminating sheets or self-adhesive laminating pouches, and a credit card-sized template for accurate cutting. Optional tools include a cutting mat and a paper trimmer for straight edges. Canva or other free design software lets you create custom graphics at the correct dimensions (85.60 × 53.98 mm).
Q: Can I use any home printer for printing credit card skins?
A: Most inkjet and laser printers work with printable vinyl, but check your printer’s manual to confirm compatibility with sticker paper. Inkjet printers typically deliver richer colors on matte vinyl, while laser printers handle glossy finishes well. Always do a test print on regular paper first to verify sizing, then print on the vinyl sheet with the coated side facing up for best results.
Q: How do I ensure my design fits perfectly on a credit card?
A: Set your design canvas to 85.60 mm × 53.98 mm-the standard credit card size-in Canva or another design tool. Add a 1-2 mm bleed area around the edges if you’re using a border or background color. Print a test version on regular paper and hold it against your actual card to check alignment before printing on vinyl.
Q: How can I make my DIY card skins last longer and resist wear?
A: After printing and cutting, seal each skin with a clear laminating sheet. Trim the laminate slightly larger than the skin to create a protective border. This prevents peeling, moisture damage, and edge fraying. Avoid folding or stacking skins tightly, and store them flat until use. Lamination significantly improves durability during daily handling.
Q: Is it safe to use custom skins on my actual credit cards?
A: Yes, as long as the skin doesn’t interfere with the chip, magnetic stripe, or card number visibility. Apply the skin smoothly without wrinkles or bubbles to prevent scanning issues. Never glue or permanently alter a real financial card. These skins are best used on expired cards, gift cards, or dummy cards for aesthetic or organizational purposes.